 Save
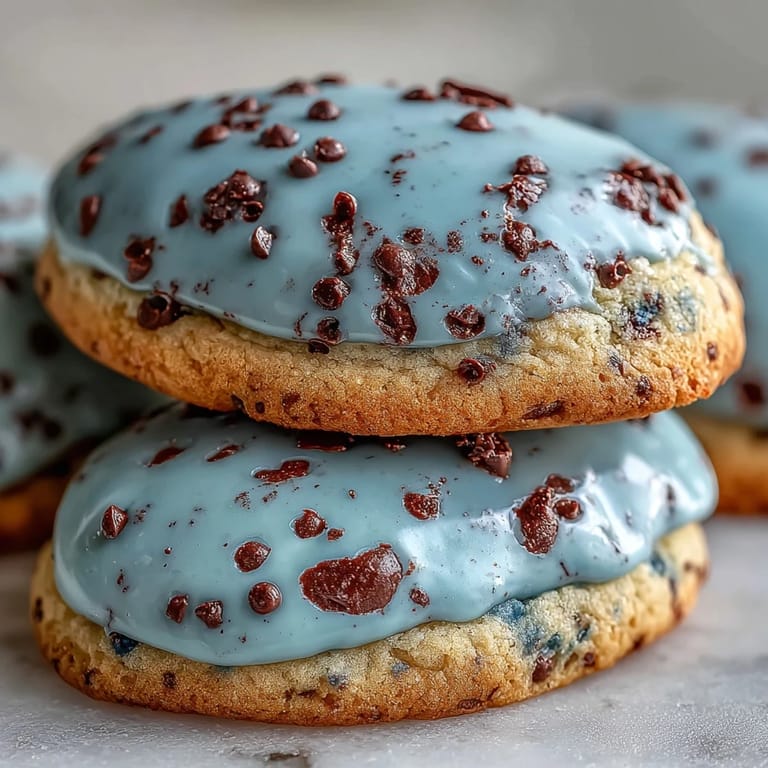
Save The scent of buttery sugar cookies mingled with a hint of vanilla always reminds me of early spring afternoons. Last year, just as the cherry blossoms were peeking out, I stumbled across a robin hopping around our yard and decided those delicate eggs might inspire my next bake. I hadn't planned anything extravagant, but the idea of soft blue cookies speckled like nature's own art seemed playful. Making these robin's egg cookies felt more like crafting, and there was a satisfying joy to watching their gentle blue tones emerge. The best part? Their cheerful look brightens any dessert table, especially when the days are still a bit chilly.
I remember the afternoon I made a double batch for a spring brunch with neighbours. Kids were keen to help flick chocolate speckles on the cookies, and my kitchen was alive with giggles and the soft thump of cookie cutters on the counter. The sunlight streamed in, highlighting our floury hands and the growing pile of pastel treats. These cookies seemed to encourage both conversation and creativity, turning an ordinary day into a small celebration. Even my usually reserved neighbour asked for the recipe after her second cookie.
Ingredients
- All-purpose flour: Gives structure to the dough — sifting helps avoid lumps and keeps the cookies tender.
- Baking powder: Adds a slight lift, making the cookies light yet crisp.
- Fine salt: Balances sweetness; just a touch enhances flavor.
- Unsalted butter: Softening the butter leads to fluffy cookies and easier mixing.
- Granulated sugar: Sweetens and adds delicate crispness; beating it well with butter is key.
- Egg: Binds everything together while adding richness.
- Pure vanilla extract: Offers deep, classic aroma that makes each bite comforting.
- Almond extract (optional): Adds subtle complexity; just a splash transforms the flavor profile.
- Blue gel food coloring: Creates vivid pale-blue dough without thinning it; start with a little and adjust as needed.
- Powdered sugar: The base for royal icing, sift to remove clumps for a silky finish.
- Milk: Thins out icing for perfect spreading and shine—add a little at a time.
- Light corn syrup: Keeps royal icing glossy and helps it set smoothly.
- Unsweetened cocoa powder: For speckles, its deep color stands out on pale icing.
- Vanilla extract: Softens cocoa's bitterness for pleasant chocolate flecks.
- Water: Turns cocoa into a speckling mixture; add slowly for the right consistency.
Tired of Takeout? 🥡
Get 10 meals you can make faster than delivery arrives. Seriously.
One email. No spam. Unsubscribe anytime.
Instructions
- Mix the dry ingredients:
- Whisk together your flour, baking powder, and salt in a medium bowl — the texture should feel light between your fingers.
- Cream butter and sugar:
- Beat softened butter and sugar until pale and airy; you should see creamy swirls and feel the vanilla scent lifting the mood.
- Add egg and extracts:
- Crack in the egg, vanilla, and almond extract (if using) — mix until the dough feels cohesive and smooth.
- Combine and color:
- Slowly add the flour mixture, mixing just until it disappears; work in blue gel coloring a bit at a time, swirling softly to reach that robin's egg glow.
- Chill the dough:
- Split into two discs, wrap in plastic, and chill at least 30 minutes; this makes rolling much easier and prevents messy spreading.
- Preheat and prep:
- Set oven to 350°F and lay parchment on baking sheets — the anticipation builds as the kitchen warms.
- Roll and cut:
- Lightly dust your surface with flour, roll dough to about 1/4 inch thick, and use egg-shaped cutters to create your cookies.
- Bake and cool:
- Space cookies on sheets so they're not crowded; bake about 10 minutes until just set, leaving edges pale, then cool on a rack.
- Make the icing:
- Whisk powdered sugar, milk, corn syrup, and vanilla together; tint blue and stir until glossy and spreadable.
- Decorate cookies:
- Spread or pipe icing over each cooled cookie — let them rest so the glaze firms up.
- Speckle:
- Mix cocoa powder, water, and vanilla; dip a stiff brush and flick over cookies for delicate speckles (cover counters — it gets messy).
- Dry and store:
- Let icing dry completely before sharing or storing in an airtight tin for up to a week.
 Save
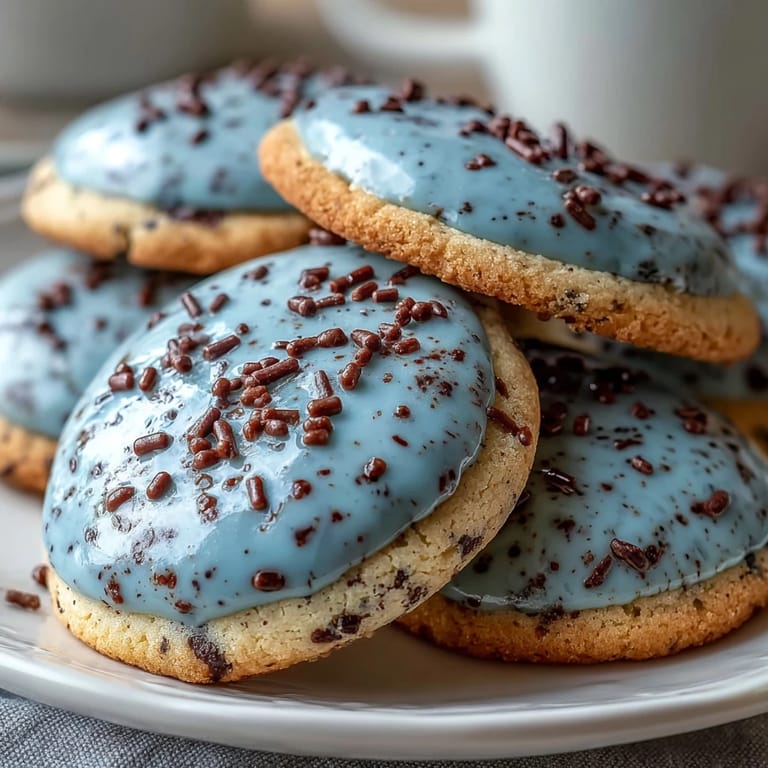
Save The moment these cookies took on their true charm was during a family gathering when decorating turned into a little friendly competition. We compared speckle patterns, laughing at the sometimes wild splatters, but those homemade imperfections made them even more whimsical. Sharing them over cups of tea, I realized these cookies always invite connection. They’re more than sweet treats; they’re tiny pieces of spring happiness, passed hand-to-hand. There’s something magic about seeing people pause to admire their beauty before taking a bite.
Tips for Making Perfect Speckles
No matter how careful I am, speckling always gets a little messy. Cover your counters and wear an apron, because flicking cocoa mixture can surprise you with chocolate dots in unexpected places. Test your brush or toothbrush by flicking onto a paper towel first — you want controlled speckles, not muddy streaks. If you mess up, don’t worry: the cookies are forgiving, and imperfections look surprisingly natural. Being bold with your flicks often pays off.
Choosing the Blue Shade
It took me several batches to find the best shade of pale blue for these cookies. Gel coloring works wonders, allowing you to add drops gradually and swirl them in until it looks just right. Too much color makes them look cartoonish, so use a toothpick to add tiny amounts if you're wary. Every batch turns out a bit unique, with slight variances in shade that feel charmingly homemade. If in doubt, hold the dough up in daylight; natural light shows the color true.
Rolling and Cutting for Even Cookies
Rolling the dough evenly really helps the cookies bake up uniformly, avoiding burnt edges or underdone centers. Use guide sticks or a ruler for a steady hand, and press cutters firmly but gently so the shapes stay crisp. If the dough sticks, a sprinkle of flour under and over it works wonders. Make sure to lift the cutouts with a thin spatula to avoid bending them. For best results, chill cut cookies on the sheet for a few minutes before baking.
- Handle rolled dough quickly to keep it cool.
- Dip cutters in flour between cuts for tidy shapes.
- Always transfer cookies to a wire rack as soon as they're firm enough.
 Save
Save However you decorate these cookies, a plateful feels like its own quiet celebration of spring. Try them with someone special, and see how even flour-dusted hands and imperfect speckles create lasting smiles.
Recipe FAQs
- → How do I achieve the robins egg look?
Use blue gel food coloring for subtle tint, then flick cocoa mixture on iced cookies for chocolate speckles.
- → Can I omit almond extract?
Yes, almond extract adds a mild flavor but is optional. Vanilla alone is sufficient for delicious results.
- → How should cookies be stored?
Keep cookies in an airtight container at room temperature for up to one week to maintain freshness and texture.
- → What tools are required for speckling?
A food-safe paintbrush or clean toothbrush is ideal for flicking chocolate speckles over finished iced cookies.
- → Can I use other shapes for the cookies?
Egg or oval cutters create the spring look, but round cutters work just as well for a classic presentation.