 Save
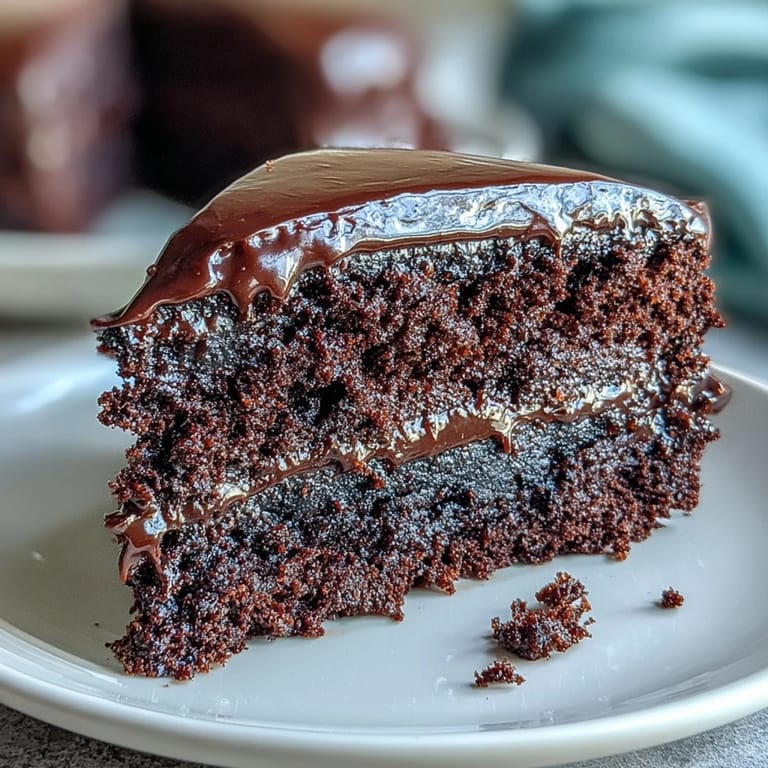
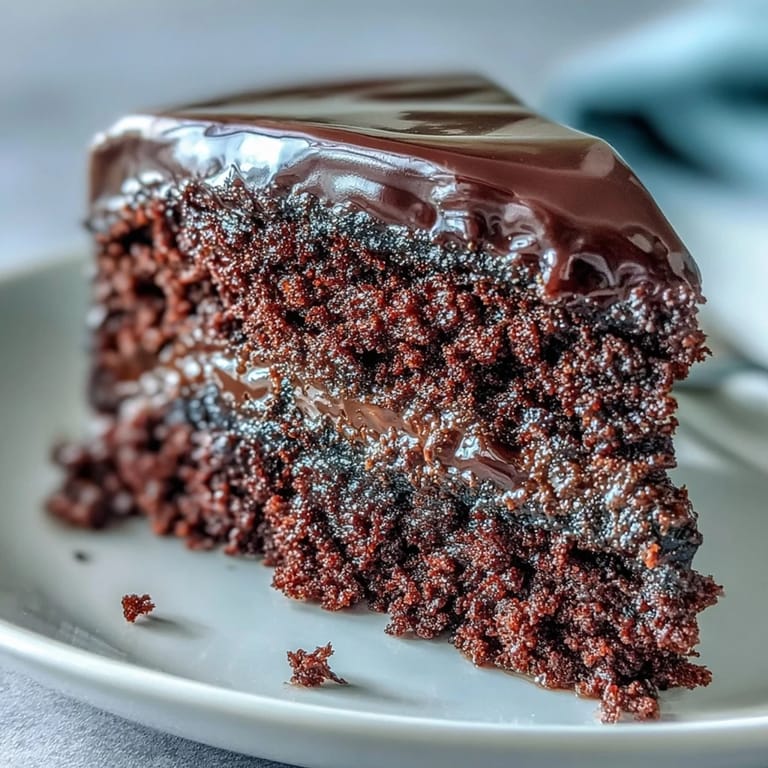
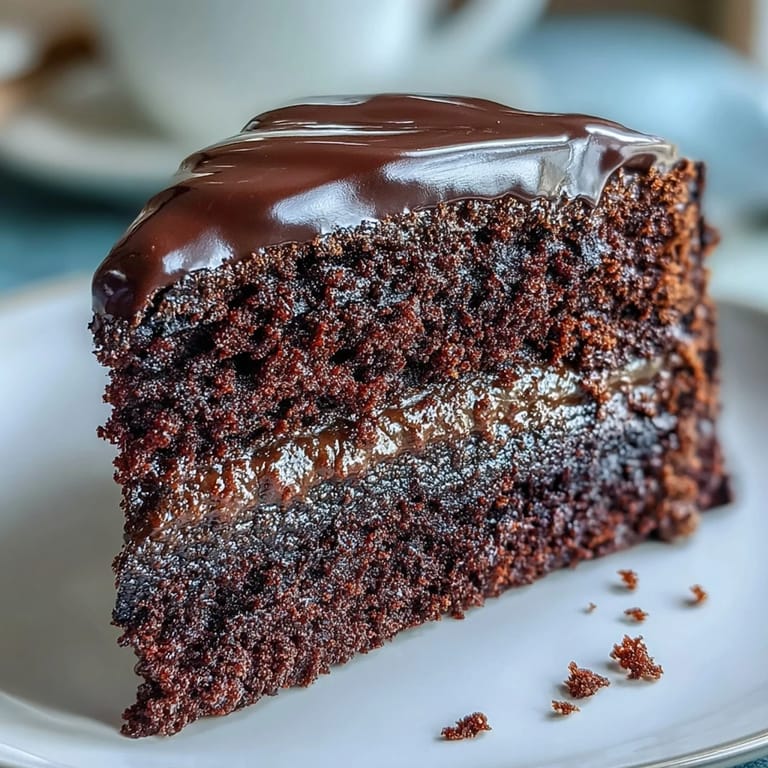
Save My sister once called me at 9 p.m. asking if I could bake a birthday cake by morning. I had this recipe scribbled on a tea-stained card, and somehow, despite the panic and the mess, it came out perfect. The kitchen smelled like a chocolatier's dream, and I remember thinking that any cake this forgiving deserves a permanent spot in my repertoire. It's been my go-to ever since, not because it's fancy, but because it never lets me down.
I made this for a small gathering once, and people kept coming back for slivers until the entire thing vanished. One friend admitted she doesn't usually like chocolate cake, but she ate two slices and asked for the recipe. That's when I knew this wasn't just another dessert. It has a way of winning people over quietly, without needing decoration or fanfare.
Ingredients
- 200 g unsalted butter (plus extra for greasing): Use good-quality butter here, it adds richness and helps the cake stay moist for days.
- 200 g dark chocolate (minimum 50% cocoa solids), chopped: Don't go too high on the cocoa percentage or the cake can turn bitter, around 50-60% is the sweet spot.
- 250 g light brown sugar: The molasses in brown sugar gives the cake a deeper, almost caramel-like flavor that white sugar just can't match.
- 3 large eggs: Make sure they're at room temperature so they blend smoothly and don't seize the chocolate.
- 200 g plain flour: Plain flour keeps the crumb soft and tender, no need for self-raising here.
- 1 ½ tsp baking powder: This gives just enough lift without making the cake too airy, we want fudgy, not fluffy.
- ¼ tsp fine sea salt: A small pinch balances the sweetness and makes the chocolate taste richer.
- 50 g cocoa powder: Sift this well or you'll end up with little cocoa lumps in your batter, learned that the hard way.
- 150 ml whole milk: Whole milk adds moisture and helps bring the batter together into a silky consistency.
- 1 tsp vanilla extract: Pure vanilla extract is worth it, the fake stuff tastes tinny next to all that chocolate.
- For the icing, 150 g dark chocolate, chopped: Use the same quality chocolate as the cake for a consistent flavor.
- 100 g unsalted butter: This makes the icing glossy and spreadable, not grainy.
- 200 g icing sugar, sifted: Sifting is non-negotiable unless you want a lumpy icing that looks homemade in the wrong way.
- 3 tbsp whole milk: Adjust this slightly if your icing is too thick, it should spread like silk.
Tired of Takeout? 🥡
Get 10 meals you can make faster than delivery arrives. Seriously.
One email. No spam. Unsubscribe anytime.
Instructions
- Prep Your Tins:
- Preheat your oven to 180°C (160°C fan) or 350°F, then grease and line two 20 cm round tins with baking paper. Don't skip the paper or you'll be chiseling cake out later.
- Melt the Chocolate and Butter:
- Set a heatproof bowl over a pan of barely simmering water, add the butter and chopped chocolate, and stir until glossy and smooth. Let it cool for a few minutes so it doesn't scramble the eggs.
- Whisk the Eggs and Sugar:
- In a large bowl, whisk the sugar and eggs together until they turn pale and thick, almost mousse-like. This takes a few minutes but it's worth it for the texture.
- Combine Wet Ingredients:
- Stir the melted chocolate mixture into the egg mixture, then add the vanilla extract. The batter will look glossy and smell incredible.
- Sift the Dry Ingredients:
- In a separate bowl, sift together the flour, baking powder, salt, and cocoa powder. Sifting aerates everything and prevents clumps.
- Fold and Mix:
- Gently fold the dry ingredients into the wet mixture, alternating with the milk, until just combined. Don't overmix or the cake will be dense and tough.
- Divide and Bake:
- Split the batter evenly between your two tins and smooth the tops. Bake for 30 to 35 minutes, until a skewer comes out with a few moist crumbs, not wet batter.
- Cool Completely:
- Let the cakes cool in the tins for 10 minutes, then turn them out onto a wire rack. Icing a warm cake is a one-way ticket to a melted mess.
- Make the Icing:
- Melt the chocolate and butter together over simmering water, then remove from heat and gradually beat in the icing sugar and milk. It should be smooth, glossy, and spreadable.
- Assemble the Cake:
- Place one layer on a serving plate, spread a third of the icing on top, then add the second layer. Cover the top and sides with the remaining icing, smoothing it with a palette knife for that bakery finish.
 Save
Save There was a rainy Sunday afternoon when I made this just for myself, no occasion, no guests. I ate a thick slice with a cup of tea while the rain drummed on the window, and it felt like the ultimate act of self-care. Sometimes the best memories aren't tied to celebrations, but to quiet moments when you treat yourself with the same care you'd give someone you love.
Storing and Serving
This cake keeps beautifully in an airtight container for up to three days, and honestly, it tastes even better on day two when the flavors have melded together. I like to serve it with a dollop of whipped cream or a handful of fresh raspberries to cut through the richness. If you're feeling adventurous, spread a thin layer of raspberry jam between the cake layers before icing, it adds a fruity brightness that makes people wonder what your secret is.
What Makes It So Fudgy
The magic is in the ratio of chocolate to flour and the fact that we're not overworking the batter. The melted chocolate and butter create a dense, moist crumb, while the cocoa powder intensifies the chocolate flavor without drying it out. It's a delicate balance, but once you nail it, you'll understand why this texture is so addictive.
Common Mistakes to Avoid
I once forgot to sift the cocoa powder and ended up with little bitter pockets in an otherwise perfect cake. Another time, I iced the cake while it was still warm and watched in horror as the icing slid off in a chocolatey avalanche. Learn from my mistakes and you'll be golden.
- Always let your cakes cool completely before icing, patience is not optional here.
- Don't swap the light brown sugar for white, you'll lose that deep caramel note that makes this cake special.
- Use a light hand when folding in the flour, overmixing will give you a tough, dense cake instead of a tender one.
 Save
Save This cake has seen me through birthdays, bad days, and everything in between. I hope it becomes a friend in your kitchen too, the kind of recipe you turn to when you need something reliable, delicious, and just a little bit magical.
Recipe FAQs
- → Can I make this cake in advance?
Yes, this chocolate fudge cake keeps well in an airtight container for up to 3 days, making it perfect for advance preparation for parties or celebrations.
- → What type of chocolate works best?
Use dark chocolate with at least 50% cocoa solids for both the cake and icing to achieve the rich, fudgy texture and deep chocolate flavor.
- → How do I know when the cake is done?
Insert a skewer into the center—it should come out with a few moist crumbs attached. Avoid overbaking to maintain the squidgy texture.
- → Can I add extra flavors to this cake?
Absolutely! Try adding a layer of raspberry jam between the cake layers for a fruity contrast, or serve with fresh berries and whipped cream.
- → What size cake tins should I use?
You'll need two 20 cm (8-inch) round cake tins, greased and lined with baking paper to ensure the cakes release easily after baking.
- → Can I make this cake gluten-free?
Substitute the plain flour with a good quality gluten-free flour blend in the same quantity, ensuring your baking powder is also gluten-free.