 Save
Save Last summer, my neighbor invited us over for what she promised would be the ultimate backyard dessert. She brought out these golden-topped bars that smelled exactly like childhood campfires, and I literally hovered around the serving plate until she laughed and told me to just take the whole corner. My kids now request these for every sleepover, and I've learned that the secret is not rushing that final broil - watching those marshmallows turn perfect golden brown while trying not to let anyone burn their tongue on the first bite has become our favorite kitchen ritual.
I first made these during a chaotic birthday party when rain forced everyone inside. The kitchen filled with that incredible toasted marshmallow scent, and suddenly damp children were pressed against the oven door, absolutely mesmerized. One mom asked for the recipe while literally eating it standing up, chocolate somehow on her chin, and now it's the only dessert anyone requests when they come over.
Ingredients
- Graham cracker crumbs: I pulse whole crackers in the food processor, but crushed-in-a-bag works perfectly if you need to take out some kitchen frustration
- Unsalted butter: Must be melted but not hot, or you'll end up with a greasy crust that never quite firms up properly
- Granulated sugar: Just enough to give the crust that subtle sweetness and help it hold together when you press it down
- Semi-sweet chocolate chips: Milk chocolate makes these almost too sweet, but dark chocolate creates this sophisticated contrast that adults inevitably claim they prefer
- Mini marshmallows: Regular marshmallows work but minis melt more evenly and create that beautiful uniform golden blanket on top
Tired of Takeout? 🥡
Get 10 meals you can make faster than delivery arrives. Seriously.
One email. No spam. Unsubscribe anytime.
Instructions
- Preheat your oven and prep the pan:
- Set your oven to 350°F and line an 8x8 pan with parchment paper, letting the edges hang over like handles - this is absolutely crucial for getting these beauties out later without destroying them.
- Make the graham cracker crust:
- Combine the crumbs, melted butter, and sugar in a medium bowl, mixing until everything looks like wet sand and holds together when you squeeze a handful.
- Press and bake the crust:
- Press the mixture firmly into your prepared pan - I use the bottom of a measuring cup to really pack it down tight - then bake for 8 minutes until it smells amazing.
- Add the chocolate layer:
- Scatter the chocolate chips evenly over the warm crust and return to the oven for just 2 minutes - you want them soft and spreadable, not completely melted into a puddle.
- Spread the chocolate:
- Use an offset spatula or the back of a spoon to gently spread the softened chocolate into an even layer, working quickly before it starts to set up again.
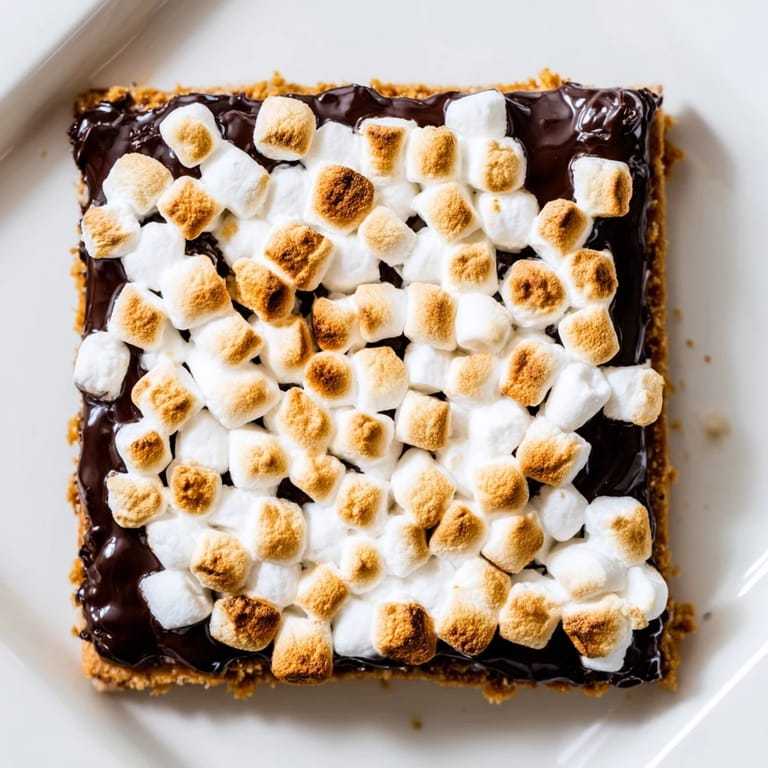
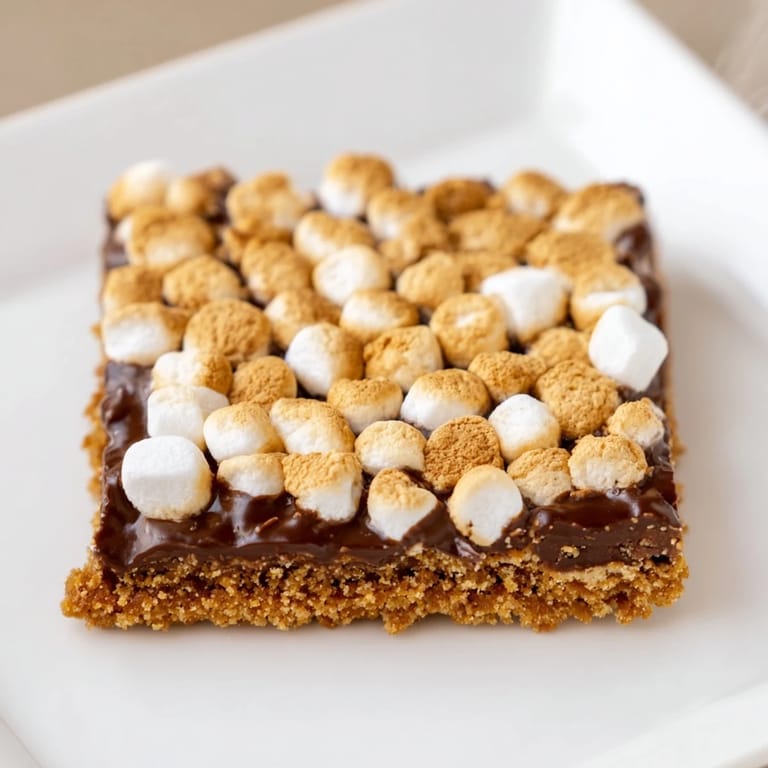
- Top with marshmallows:
- Scatter the mini marshmallows over the chocolate, pressing them ever so gently so they adhere but don't disappear into the chocolate layer beneath.
- Toast to perfection:
- Bake for 10 to 12 minutes, rotating the pan halfway through - keep a close eye because marshmallows go from golden to burnt faster than you'd believe possible.
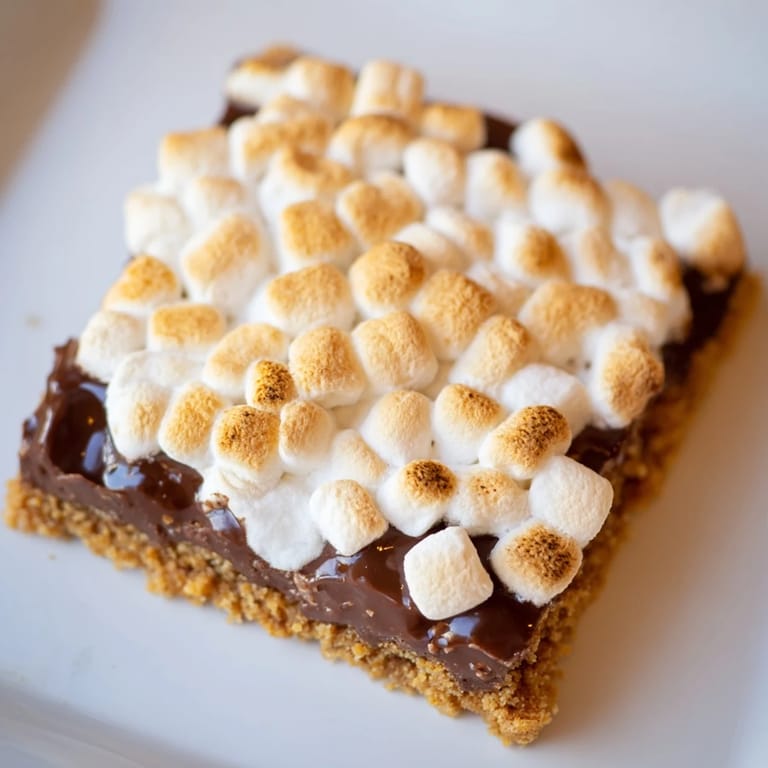
- Cool completely:
- Let the bars cool completely in the pan, then refrigerate for at least an hour - cold bars cut cleaner and the texture becomes this perfect contrast between crisp crust and yielding marshmallow.
- Slice and serve:
- Use the parchment paper to lift the whole block out of the pan, then cut into squares with a sharp knife, wiping the blade between cuts for those picture-perfect edges.
 Save
Save My daughter now makes these entirely by herself, beaming with pride every time she pulls that golden-topped pan from the oven. Last week she served them at a school gathering and came home claiming three separate people told her they were the best thing they'd ever eaten - I'm pretty sure she's already planning her bakery empire.
Getting That Perfect Marshmallow Toast
I've learned that rack position matters more than I expected. The middle rack gives the most even browning, but if you want those gorgeous browned peaks, move to the upper rack for the last two minutes. Just stand right there and don't walk away - I've turned my back for literally thirty seconds and returned to patchy, uneven marshmallows.
Customization Ideas That Actually Work
A pinch of flaky sea salt on top changes everything, cutting through the sugar and making these taste surprisingly sophisticated. Sometimes I'll press a handful of crushed graham crackers into the marshmallows before baking for this extra crunch that people can never quite identify. My sister-in-law adds chopped pecans and claims it's the only correct way to make them.
Storage and Make-Ahead Tips
These keep remarkably well in an airtight container for up to three days, though the marshmallows do lose some of that pillowy softness. I actually prefer them on day two when the flavors have had time to really meld together. They freeze beautifully too - just wrap individual portions in plastic and freeze for up to a month.
- Let them come to room temperature for about 15 minutes before serving if they've been chilled or frozen
- If the marshmallows get a bit stale, a quick 10-second zap in the microwave brings back that fresh-made gooeyness
- Always cut with room temperature bars and a very sharp knife for the cleanest edges
 Save
Save There's something almost magical about transforming simple campfire ingredients into something that feels fancy enough for a dinner party but nostalgic enough for a Tuesday night. These bars have become my go-to for everything from potlucks to midnight cravings, and watching someone take that first bite, eyes closing at that perfect marshmallow-chocolate-graham combination, never gets old.
Recipe FAQs
- → What’s the best way to get clean slices?
Chilling the bars in the refrigerator for about an hour before cutting helps achieve neat, clean slices.
- → Can I substitute ingredients in the crust?
Digestive biscuits can replace graham crackers for a different flavor and texture in the crust.
- → How do I get marshmallows perfectly toasted?
Bake the assembled bars until marshmallows turn golden and lightly toasted, usually 10–12 minutes under heat.
- → Is it possible to make these bars sweeter?
Using milk chocolate chips instead of semi-sweet increases the sweetness and complements the marshmallow topping.
- → What tools are essential for this dessert?
A baking pan (8x8 inch), mixing bowls, spatula, and parchment paper are key to assembling and baking these bars.